00:00
00:00
DiMono
Deploy the... I think it's a yellow button... it's usually flashing... it makes the engines go... WHOOSH!

DiMono @DiMono

Age 43, Male

Website Developer

Toronto, Ontario

Joined on 9/8/04

Level:
32
Exp Points:
11,032 / 11,370
Exp Rank:
2,814
Vote Power:
7.35 votes
Rank:
Sup. Commander
Global Rank:
186
Blams:
4,168
Saves:
35,103
B/P Bonus:
60%
Whistle:
Deity
Trophies:
2
Medals:
5,343

DiMono's News

Posted by DiMono - February 1st, 2010


Xtreme 5 Min Shootemup

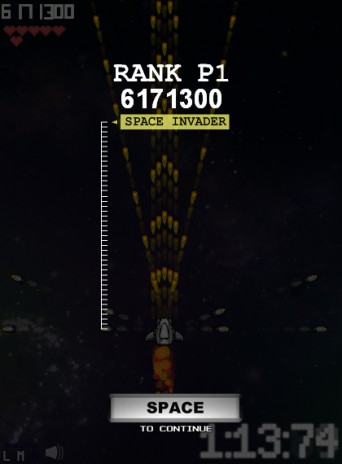
For anyone who's wondering what the best score you can realistically get in this game is here on Newgrounds... it's probably something like this.

I normally play this on my computer at home, which is very fast. The other day I played it at work and found I could more reliably get a solid score, because the computer runs slower and I have more time to think. Took it right down to the wire this time. My score going into the final boss fight was 3.32mil and I'd only been hit once, so I was able to sacrifice some hits in the name of finishing the game.

Then, today I played at home again and after a spectacular first Act (877k going into the first boss) I got the score below, taking over 3.35mil into the final boss fight with plenty of time to spare. This game is addicting!

Feb 11, 2010 edit: Just played it again and increased my score by almost 10,000, bringing my new all time best to what you see below. Entered the final boss fight with 3.36mil and 6 hearts to burn, and got my final level up after destroying the last red circle cannon on the right armature of the final boss. I wonder if I can hit 6.2mil...

I guess you can set this game next to Paradox Embrace for medal games I totally own.

I Am So Xtreme


Posted by DiMono - January 27th, 2010


Back to Medal Game index

M-Bot

This is a new medal game that came out today, created by MindChamber and Evan Greenstone. It's INCREDIBLY AWESOME. Here's how you play:

Gameplay

You are M-Bot, lowly moderation bot of the Newgrounds website, and your job is to get rid of the spammers. To do this, you run around shooting them in the street, because you're just that awesome. Some of the enemies have ranged attacks, so you'll need to be able to dodge, and there are cars that come at you, so you'll need to dodge or jump over those as they come. Remember that you can also move forward and backward, as this will be necessary for jumping over cars.

There are two options for controlling M-Bot: mouse or arrow keys. If you're using the mouse it's easy to move quickly across the screen, but it takes some practice to learn how to navigate precisely, through the minefields and obstacles. The arrow keys are arguably easier for pricise navigation, but I've found it too easy to accidentally go across the screen when I don't want to. I prefer the mouse, but others may not.

Score and life are determined by how many (gold) shields you pick up, in one way or another. If your score/life drops below 0, you lose and have to try again. You get shields by killing enemies, and the larger your current juggle when an enemy bites the dust, the more shields they drop. You can juggle more than 1 enemy at a time, and hitting any enemy being juggled will increase the juggle combo, but as soon as one of them hits the ground the juggle combo will be reset to 0. So you can theoretically juggle 3 enemies for a combo of 80, get a 4th in the juggle and lose him immediately, then lose the other 4, and you'll only get about 100 shields out of all that. However, your juggle combo will not be reset if you take damage.

There are also large silver shields that are sometimes dropped, which govern weapons upgrades. You start with a single cannon, then you go to a double, then a triple. If you collect a large silver shield while already at the triple gun, you'll gain the ability to press Z to transform to K9 mode. While in K9 mode you cannot be harmed, all your attacks are melee, and you move faster, while looking like a mechanical dog. When K9 mode is almost over you'll hear a power-down sound, which will give you enough time to get somewhere safe so you don't take damage after returning to your single gun, to do it all over again.

Some shields are already placed on the level before you begin. There are 30 at the start of the main game, and then they will show the safe path through obstacles. Aside from the first 30, these will all have shadows under them, so you'll know where to go to stay safe.

When you take a hit, the amount of life you lose is proportional, rather than fixed. That means you'll lose more for taking a hit with 1000 life than you will for taking one with 100 life. Hit Detection is generous in this game, which works for you when you're trying to string a juggle, but works very much against you as well when you're trying to dodge cars. You also don't have to be on the ground to get a shield, which means you can jump, go across the screen to get some shields, then come back over to where you started while still in mid-air if there are cars in the way.

Enemies and Obstacles

Enemies: There are two main forms of enemy in the game, being enemies with whips and enemies who shoot fireballs (survival mode only). These can be shot, juggled, and destroyed for shields as outlined above. They often occur at the same time as cars do.

Cars: They travel the city streets, running over the poor M-Bot and doing him damage. You can jump over them, and you can evade them, but except while in K9 mode you cannot destroy them. If you destroy a car in K9 mode it will give you shields.

Minefields: They look like stereotypical game mines, grey circles with red buttons on top. If you run too close to them, the buttons turn green, and if you step on them or if you are jumping above them, they'll explode. If you're standing on them when they go off, you'll take damage, but if you're in the air above them you'll be okay. There will usually be shields hovering to guide you through, and you will not encounter enemies in a minefield.

Posts: These only occur in the main game, and are always found in a straight line. They are preceded by construction barricades, so if you get in line between the barricades you'll be okay.

Walls: These occur one after the other, and they block the entire road. Each wall has a weak spot, which will be indicated by a series of shields leading up to it, so just keep firing as you collect shields and you won't have any problems. If you're in K9 mode you can go through the wall anywhere.

The Bus: Main game only. The bus heads off toward the right shortly after starting the main game, and then turns around partway through the level to attack you. It will toss enemies at you, which can be shot, juggled and killed, but which will do damage to you if they hit you first. It will sometimes charge you, which will be preceded by a very obvious warning, and after you take away about half its life it will also spin around 180 degrees and fire a giant red laser at you. If you enter K9 mode when the bus attacks, and you attack the bus constantly, K9 mode will last for the entire duration of the fight, making it rather trivial. You will, however, be reduced to a single gun afterward.

The Final Boss: COL-LAB

When you reach the end of the streets part of the main game, you'll get to fight COL-LAB. Whatever weapon you had going in, you will be reduced to a single gun for this fight. Once you reach COL-LAB, you're here until you beat him, no matter how many tries it takes. At the beginning of the fight you will have your score set to 1000, and if you beat him without having to retry, this will be added to your score from the street section to get your final score. If you do retry, then whatever your final score against COL-LAB is will be your final score for the game.

You cannot hurt COL-LAB unless you shoot him in the head, or use his own attacks against him. He starts off with two attacks. His more common attack is to throw spinning blades at you, which you can deflect back to hit him. They will sometimes come through the air, and sometimes along the ground, so be careful which one he sends at you. He will also charge at you, with a predictable warmup, and all you can do is get out of the way.

When you've dished out enough damage to him, he'll drop a large silver powerup shield and some bombs. Grab the silver shield and you'll get a megagun for about 22 shots, which you can use to damage him without having to jump. You'll need this gun about 5 times to defeat him. When the megagun runs out, you'll be back to your single gun again.

When you've knocked him down to half his life, he'll start throwing cars at you as another random attack. All you can do is get out of the way. When he's down to a quarter of his life, he'll throw 4 subway cars at you in sequence, and it's hard to dodge them all. These are all of his attacks.

When his life is all gone, a shield will show up over his head, and you can jump on him. You'll be faced with some quicktime events, which are jump, fire, jump, fire, jump, fire. Get through them, and you win.

To make it easier to fight him, try to push him back to the right. He likes to be in front of you, and the further to the right he is the more time you'll have to deflect his blades back at him. it will also give you room to back up when he starts throwing cars. Also note that the blades he throws come side by side, not in a line, so you'll likely need some vertical movement to deflect them both, especially in the air, or else you'll get hit. When it comes to dodging the subway cars, just do your best to move diagonally, and don't anticipate too much or he'll throw at the middle and you'll get hit no matter where you are.

Main Game
This is broken into the following areas, which can all be passed according to what's been outlined above:

- 30 Shields (initial life)
- Cars and enemies
- Posts
- Cars and enemies
- Bus
- Cars and enemies
- Minefield
- Cars and enemies
- Walls
- Cars and enemies
- COL-LAB

Survival Mode
In this, your score always goes up, and shields and damage affect your Fuel instead. Survival mode alternates between cars and enemies, and minefields with a single row of mines and a single row of shields. You've just got to last as long as possible. Doing this will require avoiding K9 mode unless absolutely necessary, because you'll need the triple gun after getting to about 10k points in order to keep up with your fuel loss. If you enter K9 mode later than about 5k, you probably won't make it to 15k, and if you enter at 10k or later your game will likely end about 1400 later.

Survival Mode Weapon Quirks: Once you have the ability to go to K9 mode, you don't lose it until you use it. That means you can be down to a single gun, and still be able to use it. This may become invaluable toward the endgame. It also carries over to the next game, so if you finish one Survival game without using K9, but with the ability, you'll start the next Survival game with the ability. Also, if you finished your previous Survival game with a double gun, then your first upgrade in your next game will be straight to Triple. Finally, if you take a hit with the triple gun, the readout will say you're down to a single, but you'll really have a double.

MINEFIELDS ARE NOT YOUR FRIEND. I know it may sometimes seem like they are, but they're really not. Especially late in the game, when they become convoluted and the shields they provide aren't enough to keep you fully charged in the first place. Further, it takes a while to get a decent combo going, and if it's late in the game then by the time you get your combo you're already dead. I've never gotten more than 11k points in a game that was minefield-heavy. If you hit a minefield between 11k and 14k, your game is over. If you hit one at 14k, just collect all the shields and you'll probably reach 15k for the medal. Note that the location and quantity of minefields is random, so you won't get two games the same.

However, there's a quirk you can use to get past the minefields fairly easily. Whenever possible, stay in the middle rather than following the shields. The generous hit detection means you'll pick them up anyway. Similarly, you'll want to avoid the urge to stay toward an edge of the screen for safety, because being in the middle (just below the solid lines in the street) will give you the greatest chance at killing everything, again due to the generous hit detection. Just remember that all the cars except those at the very top will be able to hit you too, so you'll have to be nimble. I got the medal the first time I used this strategy, after failing countless times by sticking to the bottom.

Finally, you live and die by the size of your combo, but all those giant combos are meaningless if you run out of fuel before collecting on them. So it will be worth your while to let someone fall to the ground during a big combo once in a while so that you can collect on their shields.

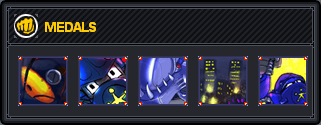
5 medals, 250 points
BounceOnMyLazor (25): String a 50 hit juggle on an enemy. Juggle rules are outlined above. The triple gun is all but necessary for getting this medal because it fires faster and has a larger hit area. The in-game popup for this medal is wonky, sometimes not showing up at all, other times showing up and not going away, blocking part of the play area.

JustBeatIt (25) (not JustBeATit): Beat the game. As long as you make it to the boss in the main game, you can just keep trying him until you win.

3K9 (50): Uses K-9 mode 3 times in main game. You get access to K9 mode by collecting a levelup shield while at level 3. Once you've done that, press Z to activate K9 mode. To get the medal, activate it as soon as you can, in order to get back to level 1 as quickly as possible to give you lots of time to build back up to it again. Going for this medal will make it extremely difficult to get CitySweeper, because the single gun you're returned to when K9 ends just doesn't have enough kick to get you shields fast enough.

CitySweeper (50): Get 1500 in main game. You must play well, Padewan. Save K9 mode for the bus, as the dudes it throws at you are really annoying and sometimes hard to dodge, and for after the wall segment. If you do this, and don't get hit during the game, you can actually enter the final battle with COL-LAB with a score that's already over 1500, meaning all you have to do is defeat COL-LAB without dying and you'll get this medal. Remember how many points you have going in to COL-LAB, and if your COL-LAB score stays above 1500 - that, you will get the medal.

DaLongestMile (100): Get 15000 points on survival. Save your K9 mode for the first minefield, if you must use it at all, and then put it away forever. This is because your life/fuel will be going away too quickly to regain it with the single gun, and after K9 mode that's what you go down to. So when you get the triple gun, just keep it. If you're going to run out of fuel close to the 15k mark, back up all the way to the left. The reason for this is that the score keeps counting until you run off screen to the right, so the longer you make that take the better your chance of fluking it. There is no popup for this medal.

M-Bot Walkthrough


Posted by DiMono - January 14th, 2010


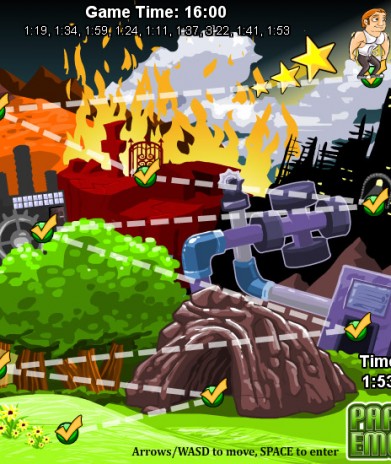
So there's this game called Paradox Embrace which has some ad space on the front page, and has medals associated with it. Three of those medals are for finishing levels quickly: Speedy Runner is for doing levels 1-5 in under 20 minutes, Spacetime Traveller is for levels 6-9 in under 20 minutes, and Paradox Embracer is for doing the whole game in under 19 minutes.

My best time for the game was a little over 17 minutes, and this afternoon I cranked the quality down to low and gave it another go. Man, did it ever make a difference! I now believe all my level times are within 1 or 2 seconds of being optimal, as listed below. My total game time is down from over 17 minutes to 16:00 even.

So this post is partly me bragging about my times, and partly me giving some advice: if you're struggling with your level times for the speed run medals, play this game on low quality even if you think you're getting proper performance at high; you may be pleasantly surprised.

Paradox Embrace


Posted by DiMono - December 17th, 2009


Listen to Benny the Yak. You know you want to. With a name like that, how could you not?


Posted by DiMono - December 17th, 2009


Medal Game Table of Contents

Tetraform is a new game from Glaiel-Gamer. You play it by attracting ships to each other in order to blow them up. What follows are some general tips, followed by advice on getting each individual medal.

Gameplay
The game runs in waves. Sometimes you will have power-ups offered to you between waves (i.e. after the first wave you get a bunch of health, after the third wave you get a spike, before bosses you get a bunch of health and a nuke, etc). Wave advancement is based on time passed, not on how much of the previous wave has been dispatched. You can attract anything to anything else, including power-ups to ships and anything to your planet.

When a ship is destroyed by crashing it into another ship, the resulting explosion is attracted to your planet to help terraform it. As your planet continues to grow you will first see dirt appear, then grass, then some trees, clouds, an ozone layer, and finally some higher level clouds.

When two items are being attracted to each other and another is very near one of them, that other item will fall under the same attraction beam. This is used to generate combos. When two objects (ships, missiles, Doomsday Devices) explode, anything caught in the middle also takes damage from the explosion.

Pressing F puts you in fullscreen mode. There are two benefits to fullscreen mode:

1) No chance of clicking outside the game window
2) The game runs more smoothly

Unfortunately, users with Radeon graphics cards sometimes have problems with Flash running in fullscreen, so if you have a Radeon card make sure your drivers and your Flash version are both fully up to date, and close everything else before hiting F just in case.

The Power-Ups
There are three:

1) Health. Blue circle with a cross in it. Use this to terraform your planet. Drawing one toward an enemy will heal it.
2) Nukes. Red circle with a radiation symbol in it. Use this to blow up every enemy on screen except bosses, and all unclaimed power-ups. You will not get experience or growth from enemies destroyed in this way. There is a short time delay between activating the nuke and having it go off. Nukes can be stockpiled.
3) Spikes. Purple circle with a spiky ball in it. Think of them as decoys you can draw other ships toward as a last resort. You may have up to 5 of them on your planet. You can also attract them to enemy ships to turn them into spikes themselves. When an enemy is spiked, it moves slower and has more hit points. A spiked boss cannot be destroyed. Spiking a spike does nothing.

The Enemies
Smaller enemies move faster, and larger enemies move slower. Some of them fire missiles, others launch Doomsday Devices that release several missiles at once when the timer runs out. In general, they will either circle your planet, or approach it directly. It will become obvious as you play which types of enemies do what. The thing to watch out for is when you're being swarmed, because it's easy to lose track of which enemies are where and end up taking lots of damage. To prevent this, you should use a nuke when there are too many enemies to keep track of.

There are some special enemies and effects to watch out for as well:
- The purple spheres get jittery, which makes them hard to target. Try to get them early.
- There are blue ships late in the game that can turn invisible. They are still targetable, you just can't always see them.
- When an enemy that fires missiles is attracted to another enemy, its missiles will also be attracted to that enemy.
- When an enemy is destroyed while attracted to another enemy, the other enemy will maintain its momentum but be free from any attraction beam. This means if it happens to be directed at your planet, it's probably going to hit it.

Tactics
- Make sure you don't attract two ships from opposite sides of your planet, or they will likely both hit your planet instead of destructing on each other.
- Try to crash enemies into identical counterparts (i.e. crash a Destroyer into a Destroyer, etc) so that they immediately kill each other. This will make your life easier in the longrun.
- When a ship launches a missile or Doomsday Device, attract it back to the ship that launched it.
- It's efficient to destroy ships with those that are close to them, but it's not always the best idea as it could leave you with two ships on opposite sides of your planet as the last two in the wave. Don't be afraid to let the wave develop before making your decisions.

The Bosses
- The first boss is very straightforward: wait for him to launch his 7 missiles, then direct them back at him one by one. Missiles travel in circles, so just keep your cool and all will be well. To avoid having any straggling missiles, make sure you attract missiles to each other 3 or 4 times. This is because if you don't, the boss will be destroyed with an odd number of missiles left on screen, and you won't be able to get rid of all of them.
- The second boss cannot be targeted directly, but you can attract his projectiles to each other on top of him and he'll get caught in the explosion and take damage. One of his projectiles is a very large missile, so make sure you attract it to something. I like waiting for the first pair of normal missiles, selecting the one from that pair which is closest to my planet, then waiting for the big one and attracting them together. Usually works pretty well.
- The third boss is only really a threat because of how randomly it moves, sometimes launching Doomsday Devices (he's your first encounter with them, incidentally) from off-screen where you can't do anything about them. You'll need to pay attention to him and be quick and nimble. He will also dart in and destroy your spikes without taking damage himself, which is annoying.
- The final boss is kind of erratic, moving randomly, teleporting, changing size, and being able to absorb a tremendous amount of damage, which means if he hits one of your spikes your spike will die. He launches Doomsday Devices and sometimes teleports away right afterward, so if you can't attract them to him be sure to attract them to each other.

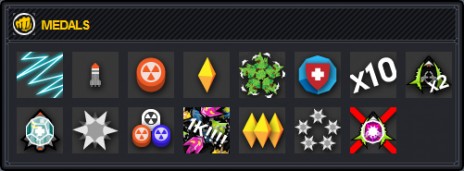
The Medals: 15 Medals, 405 Points
My Ears! (5pts) - Have an attraction beam live for 15+ seconds. The easiest way to do this is to spike a boss (earning the 100pt medal below), and then attract the boss to your planet. The other way it might be done is to attract two Destroyers from opposite sides of the map first to smaller ships that are further toward the edges of the screen, thus pointing them away from each other, and then attract them to each other. They will then have to turn around before approaching each other, which may make the beam last long enough to get the medal.

Straggler (5pts) - Beat the game with one missile still left on the screen. This involves letting a Doomsday Device go off near the end of the final boss fight, and using its missiles to destroy him rather than the Doomsday Devices themselves. It takes a bit of patience and a lot of balls.

Hiroshima (10pts) - Nuke more than 20 enemies at once. Just let a bunch of the small quick enemies build up, and then hit the button. There are a few waves with large amounts of small quick enemies, so just wait for one of those levels and let her fly.

You're A Winner! (10pts) - Beat the game. As soon as the final boss dies, you get this medal.

Al Gore Would Be Proud (25pts) - Get a full planet. Minimize damage, claim all health bonuses, and watch your planet grow. If you take little enough damage, you'll get this a wave or two before facing the final boss.

C-C-C-C-Combo Breaker! (25pts) - Get hit after destroying exactly 30 enemies without getting hit. The fastest and easiest way to get this one is to do it from the very start. Destroy the first 30 ships, and then wait. Note that you will take massive amounts of damage from doing it this way, so you may want to start a new game after getting it. If you do it this way, you can use your score as an indicator of when to get hit, since each of the first 30 ships are worth 10 points; when you're at 300, it's time to take one in the face. It's easiest to do this if you only crash two ships at a time, with no combos. (last tip courtesy OneRedMage)

C-C-C-C-Combo! (25pts) - Get a chain of 10+. This is done on the second level with the grey ships that launch doomsday devices. When there are a bunch on the screen, near each other, let them all launch their devices. Pick out a device and a ship, such that the attraction beam will have to go through other ships/devices to reach between them. Select the ship, then as soon as the device triggers select one of the missiles. Everything will be attracted to each other, and you should get the medal.

Double Whammy (25pts) - Get a multiplier on a boss. This happens when the last hit on the boss happens to have come while more than one missile was attracted to it. Depends largely on luck, or else fantastic strategy.

Humanitarian (25pts) - Heal an enemy ship. Simply attract a health power-up to an enemy ship.

Sidekick (25pts) - Have a spike at the end of the game. Since the final boss destroys spikes instantly upon contacting them, this one depends largely on luck.

USA! USA! (25pts) - Beat the game using exactly 2 nukes and have ones leftover at the end. Just stockpile them and try to resist the urge to use them. Make sure you collect at least 3 and use exactly 2.

Use The Force! (25pts) - Kill 1000 enemies. If you beat the game without dying, you will get this medal.

You're a Real Winner (25pts) - Beat the game without continuing. You have to continue when you die. So don't die.

Pentaforce (50pts) - Get 5 spikes on the planet at once. Play quickly, and play well. The spikes will accumulate over time. When you need to crash a ship into a spike, keep track of which ones have taken how much damage and be sure to spread it around. You will get 6 spike power-ups offered to you, so you are allowed to lose one, but no more.

That's No Moon (100pts) - Convert a boss into a spike. Easiest way to do this is to leave that first spike you're offered out there until the first boss shows up after wave 5, and then drag it to the boss. Note that the spike power-up will be affected by attraction beams, so going for this medal means you have to change your playstyle to not attract any ships on that side of your planet within range of the power-up.

If there's anything I missed, or anything that needs updating, let me know and I'll add it and credit you.

Tetraform Walkthrough


Posted by DiMono - December 3rd, 2009


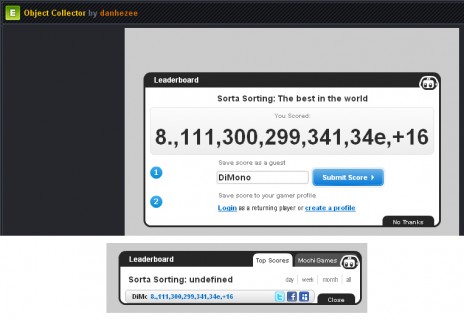
I think I broke it.

For the record, this is currently my high score. It is roughly 81,113,002,993,413,400 (written as 8.,111,300,299,341,34e,+16) but Mochi can't handle scores that big so I don't get to submit it. So instead I pout a little.

Object Collector


Posted by DiMono - December 1st, 2009


Back to Table of Contents

Applez (14 medals, 360 points)

The levels in this game are all pretty straightforward, though some are challenging, so since people have been requesting it here's how to beat each one:

Level 1: Just run to the right and jump in appropriate places, and you'll get the flag.

Level 2: In order to get those platforms at the start to activate you need to hit the button, and you need to be fat for the button to work. Go to the right and you'll find an apple. Jump up to it and eat it, then walk back to the button. When it activates, puke and jump up to the flag.

Level 3: Go to the right and jump on the cat (it will hurt you if you just run into it) and then continue right and you'll see a blue bouncepad. Jump on it while moving left and you'll land on a platform with an apple. Eat the apple and then walk off to the right and you'll land back on the bouncepad. Keep holding right and you'll be launched up to the platform with the button. Step on it, puke, then move to the right to the flag.

Level 4: Avoid the axe and get past the cat to claim the apple. On the way back, while fat, you'll have to walk off to the left and bounce on the bouncepad, then land on the cat, then land on the other bouncepad. To time this right, wait until the cat is moving left and is at least halfway past the green bush. Keep holding left and you'll get to the other side. Avoid the axe again and hit the button, then puke and go up. Here you need to avoid a spinning blade. Jump over it as it's heading toward you, then go right and hop up to the platform for the apple. After you eat it wait for the blade to pass you heading to the right, then walk off to the left and keep going until you hit the button. Puke and jump up to the flag. Note that the spinning blade moves faster than you do while fat, so move at your first opportunity.

Level 5: Bounce across on the blue cats (there are spikes beneath them) and make your way up the floating platforms. You will need all the platforms provided, so make your way up all the way to the right before going left, and make sure to time your jumps. When you get to the top, eat the apple and go left past the logs (carefully), get the block and push it back the way you came. It will fall in the gap and allow you to reach the button. Keep moving right to get to the flag.

Level 6: Jump down the gap between the spikes and move right. Jump up to the next level, then dodge the axes as you jump up to the top-right platform for the apple. Wait for the axe to be out of the way and walk off the platform to the right to fall back down, and then push the block to the left until it falls down the gap. Follow it down and hit the button. Puke and move to the right until you see the axe. Jump on the axe's platform, then when it's out of the way jump off to the right. Keep going right and you'll see some platforms going up next to logs that come out of the side of the cliff. Go up the platforms to get your apple, then come back down and hit the button. Puke, then go back across to the first apple and eat it again. Hop off to the right and move right to get the second block, then push it back to the left just like you did with the first one. Once it falls into place, puke and jump up to the left to get to the flag.

Level 7: Move right and jump on the platform, which will move to the right. When it's directly over the platform that will move up, jump on the vertical platform. You may need to jump over the sideways moving one as they pass. Jump off as soon as you're within range of the next platform, as there are spikes above you. Move right to the platform that lowers, and watch for a sideways moving platform which will be to the right a little. Use it to get past the logs, jumping when necessary to avoid them, and after the 4 logs jump up the platforms on the right. Move past the axe and go up the next set of platforms (avoiding the log). Now you'll have to get past two spinning blades and two axes all at once. It's possible but the timing is a little crazy. To get through unscathed, follow a spinning blade toward the axes, and look at the timing on the first axe. If it's on its way down as you approach, jump over it and immediately jump on the axe platform to the right. Then time your jumps to get up to the apple. Go up to the apple and get it, then walk off to the left and make your way back down to the floor below you. Move right and keep holding right as you fall, and you'll land on a platform with a button (if you push the block down first it will give you a little extra leeway). Puke after hitting the button, and move back to the left. When returning to the left, there is a break in the middle of the ceiling spikes. Take advantage of it to stomp the cat; DO NOT try to do it at the rightmost end, you will lose at least one health by doing so. Go back up to the platform with the axe and move to the right, you'll go over a bridge that's now in place and jump to the flag.

Level 8: Walk off to the right and when you land, wait. A platform will come at you from the right, jump over it and then move right until you're under an opening. Wait again, jump over the next platform then keep going right until you fall in the hole. When the platform passes, jump out and move right and scale the platforms to get to the top. Get on the platform that moves left and right toward the spikes, and time your jump off so that you land on the platform that will drop, but be sure to jump right off that platform or it will take you down to be skewered. Now you need to jump on platforms while a machine pushes some at you from the right. Jump to two platforms then wait for it to throw one at you, then jump over it while moving to the next platform, jump over one more, and that should put you at the one that takes you down. Jump off it before it hits bottom, avoid getting pushed, and head up to the apple. Eat it and walk off to the right to land on the platform that will rise you up. When it's past the bouncepad walk off to the left, and the bouncepad will launch you on to the bridge so you can hit the button. Approach the button slowly, and when you hit it the bridge will actually raise you up with it. Puke and jump to the flag.

Level 9: The roof comes down on this level. Take advantage of the rest spot you encounter early on; there's no time limit. Eat the apple as soon as you come to it and then keep walking right as quickly as you can and be safe; it's all about speed here because you have a long way to go before that roof comes back down again. If you see the spinning blade coming at you, don't panic, just wait it out. Remember to spit out the apple as soon as you hit the button, then run back to the left before the ceiling comes down on you. Once at the bottom, move left, and you'll need to ride the wrecking balls up to the higher platform in order to unlock the last platforms to finish the level. Get to the platform that houses the upper ball, jump on it to the left and jump off and you'll get to the level you need to be at. Avoid the axe as you get the apple, then walk off to the right to fall back to land. To avoid getting hit by the logs coming out of the ground, start moving over them a little before they're all the way in the ground and you'll be past them before they come back up. Move left to the button, puke then move back right and fall to the lower level. Time your jumps and move left to claim your flag.

Level 10: Get past the axe, and when you jump off its platform keep holding right and you'll be bounced past the spikes. Land on the first available platform, then time the rising spikes and the axe so that you can make your way to the axe's platform. From there, you're going to jump on the blue cat and keep holding right, to bounce onto another platform in front of rising spikes. Wait until the spikes moving sideways are moving right and have passed the cat before making your move here, and you'll be able to avoid them. Jump up the platforms to the higher level, then use the wrecking ball to jump on its own platform, then use it again to get to the apple. Walk off to the left and just keep going until you reach the button, then puke and go back right. Be fearless, you'll land on a platform. After you've eaten the first apple and pressed the first button, you'll come across a wrecking ball and a platform to its right. In order to get to that platform you need to ride the wrecking ball all the way over the top, and then jump off to the right and land on the platform. Make your way up past the axes and use the bouncepad to jump you onto the last one's platform. Jump off to the right and you'll fall down to a new level with an apple. Eat it and walk to the right. You'll come across a staircase with an axe patrolling it. Go down the staircase as quickly as you can (4 steps right, 4 steps left) and bounce into the button overhead. You can get hit by the axe here, so time your bounce carefully. Puke on the way down, then jump into the overhead platform and follow the arrows and move left to claim your flag.

Boss Level: Walk to the right to activate the boss. Once you've done that he'll fire missiles at you to avoid for the entire duration of the level. Go back to the left and make your way up the platforms to the top. When jumping on the first platform, time your jump based on the missile, not the axe; you have leeway with the axe's rotational speed, but the missiles come steadily. Eat the apple, then walk off to the right to drop down to the next level. Move left (the axe WILL hit you, so make sure it only hits you once) to hit the button, then puke and go back up to get the apple again. This time walk off to the left, and then move right until you fall in the hole onto the second button. Puke and go back up to the apple, then walk off to the right and the bouncepad will launch you over the now lowered block. Move right to the third and final button to defeat the cat god, then keep going right to throw up on the princess and win the game.

If anyone has a playthrough video of this game, let me know and I'll include it in this guide.

Things You Should Know:

When you hit a button, it stays active when you die. The easiest place to get in trouble with this one is level 9, where you don't have to get the first apple again if you hit the button because your escape route is already open, and will actually block your way when fat. If you lose your last life, the level resets to its original state.

Hit detection is a little bit wonky. There will be times when you're hit by something that should have missed you. All I can say is to give yourself a little extra room when dodging.

You can stand on platforms with axes and not get hurt by them. Same goes for not getting pushed by wrecking balls when you stand right on them. Note that the first axe you encounter in the game is actually set further below the surface than most, so in that case you cannot stand above it and wait for it to go by; it will hurt you because it's further away.

You cannot take damage while eating an apple. This is especially useful on the boss level.

Medals (14 medals worth 360pts):

Aversion To Death (5 pts): Finish an easy level without dying. You'll get this on the first level as long as you don't walk off the map

Dog Person (5 pts): Stomp a cat. You'll get this on the third level.

Obey Gravity, It's The Law (5pts): Attempt to double jump. You'll get this one by accident within the first couple levels, because the game registers held-down jump buttons as two jump attempts.

Really A Dog Person (5pts): Stomp a cat while fat. You'll get this on level 4, because you need to stomp a cat while fat in order to get back to the button.

Brutal Takedown (10pts): Mid-air axe death. Get hit by an axe while you're in the air and have no health left. Lots of chances to do this.

Like A Chubby Vampire (10pts): Death by spikes when fat. Again, lots of chances to do this. My favourite is on level 7, where you can do it from a high altitude for extra impact force.

Skilled At Not Dying (10pts): Complete a hard level without dying. The first hard level is 6, and it's also the easiest. However, if you get the Untouchable medal at the same time this one won't register, so be sure to take some damage first, or else play the game twice to get both.

Slow And Steady (10pts): Get to the flag when fat. Your first chance to do this is on level 5, just don't throw up after hitting the button.

Jump, Magic Jump (25pts): Find and use the golden bounce pad. On level 10, immediately walk to the left just off the platform. It's at the bottom and will bounce you back to your starting position.

Untouchable (25pts): Complete a hard level without taking damage. Any level from 6 forward will do. 6 is probably the easiest to do this on, but you may want to take damage on 6 and get this on 7, or play the game twice and do both on 6, because if you get this at the same time as Skilled At Not Dying you won't get Skilled At Not Dying on your NG account.

Curious (50pts): Find a secret area. There are three, listed here thanks to DigDogy with a bit of further specification on the third one by me:

On level 5, after you've gotten fat drop back down to the ground and wait on the edge of the spike pit for the bouncy cat. The cat will come toward you until his feet reach the last spike, and then turn around. Be patient and time it so you walk onto his head right as he reaches the end, and bounce back to the left where you started and hit the button that's there, and the platforms will activate. Go up to the top and claim your free life.

On level 7, after you've gotten fat walk to the right and you'll fall down on a button. Puke, then go back to the left and go up to get the apple again. Walk off to the right again and you'll land on a bridge. To your left is a box, push it off the right side of the bridge and drop down. Push the button and claim your free life.

On level 10, after you bounce off the cat there will be a vertically moving platform with upward-pointing spikes on it. When it's at the top, drop down below it and you'll find an opening in the ground. Go through the opening and claim your free life. Walk to the left and you'll find an apple, a button to open the door, and the golden bounce pad to get you back to the start of the level.

Godslayer (50pts): Defeat the cat god. Basically, just pass every level as outlined at the top of this guide.

Royal Rainbow (50pts): Vomit on the princess. Pretty simple, just don't puke after hitting the third button on the boss level.

Collector (100pts): Find all secret areas. See those three I listed above? Hit them all.

And that's it for Applez.

Applez Medal Walkthrough


Posted by DiMono - November 11th, 2009


Back to Table of Contents

Wylina has a pretty solid guide up for this game. What I'm putting here are some tips and tricks I've figured out, to make your gameplay faster and easier. I've tried to put them in a logical order for you

From levels 10-24 or so, you can level ridiculously fast by running Stone Head over and over again without even moving; your mage's Mystic Orb will take care of everything quite handily, and there are no drops to miss. It took me 20 minutes total to advance 14 levels, including a fair amount of time spent with a very low level Mystic Orb because I was levelling things poorly early on. You'll level once every two visits until level 12 or 13, then once every three until about 21, then once every four until about 24 (I don't remember the exact numbers... sorry). This does not work in Hard mode, as it takes a very long time to kill him for very little experience, but the Semi-Boss can be killed rather easily to level up once every 3-4 minutes up to level 38 or so.

Once you're at the level you'd like to be at, you can go to Hill Top level 8 and kill spearmen over and over again to farm for food to feed your dragon. The revivers will keep bringing them back, and each time you kill them they can drop something new, so this is a fantastic way to grow your dragon to full size before moving on to the next act. Between the fast levelling and growing your dragon, this will give you a tremendous advantage for the rest of Normal difficulty. Their drops disappear when they are revived, so be sure to grab them quickly.

When waiting for your dragon or Mystic Orb to kill something (i.e. farming Stone Head), it goes faster if you switch to a different window and let it happen in the background; you'll hear the sounds all happen faster, and you'll be able to tell when it's done because the sounds stop. On my computer it takes half the time when running in the background.

When off-screen, your friends can do damage but cannot be hurt. What this means is that on levels like Oh Snap in Hard mode, once you've cleared out a corner as being safe you can hide and let your dudes kill everything 100% safely as long as they're off-screen. Similarly, enemies who are off-screen can't attack (i.e. scorpions, green blobs), but can take damage. Also similarly, when you open your Inventory or Options screens the enemies will still attack, but your guys won't, so be careful with when you do this and make sure you won't get anyone killed.

In Hard mode if you go to Hill Top Level 4 you can quickly and easily circle the spearmen around so they all attack from the same side, stand back and let your dragon take swings at them and kill them. Do something else in another window for an hour or two and you'll find you've levelled up a few times. Or, if you want to farm, use this level to pick up gauntlets and dragon swords (which sell for the most at this point in the game, with masks a close third), and cash, while your dragon kills the guys over and over again for you; you don't even have to move once you've set them up. With help from your mage's Mystic Orb, it will take 32 attacks for each one to die once.

Why Level 4, you ask? Hill Top Level 8 has more guys to kill, but they're harder to corral and there are 8 revivers waiting for you when you decide you're done, which is why I prefer Level 4 in Hard mode; the exit is safer. Level 8 in Normal, Level 4 in Hard. This is not the fastest way to level past level 40, but it's certainly the easiest since you can literally walk away from the computer and come back and be levelled with no threat of death. Hell, set it up before going out to dinner.

Scorpions are very predictable; they move for a few seconds, stop, aim, then fire. If you get the rhythm right, you can run in, hit them, see in which direction they'll attack, get out of the way, then move back in. Be sure to do this from a different angle than your friends are at, though, because they aren't as nimble or able to dodge as you are, and even if you get hit the scorpion's projectiles continue on through you to whatever's behind you.

The effectiveness of your mage's spells is diminished in Hard mode. When fighting Stone Head it takes 30 Mystic Orbs to kill each hand, which is very time consuming, but if you run up and attack then your weapons will kill the hands much faster, despite probably doing less damage than that listed by the Mystic Orb.

Life Steal is cumulative based on how many people you're hitting. By that I mean if you have 3 Life Steal and you hit 5 enemies at once, you'll gain back 15 life. If you're near the end of the game and have 11 life steal and hit 5 enemies, you gain back 55. And if you're wielding two weapons at the time, you get it back twice.

Because it takes a long time to finish this game, and because you get the Merlin's Apprentice medal as soon as you return to town after hitting level 49, I recommend closing the game and refreshing the page when you reach level 48. This will re-establish the game's connection with the server, and should ensure that you get credit for the last two medals when you get them. If you're not confident that this will work, you can back up your game data as follows:

1. Navigate within your computer to C:\Documents and Settings\[your computer username]\Application Data\Macromedia\Flash Player\#SharedObjects\[random characters]\uploads.ungrounded.net\516 000
2. Find the directory 516950_dragonboy.swf
3. Copy it in its entirety by clicking on it and holding the mouse button, pressing Ctrl, dragging the mouse away from it to open space, and letting go of the mouse button

Now, if you don't get credit for the medal you can close the game, rename the original directory by adding "Original " to the beginning, and rename the copy by removing the "Copy of ", and you can start over again. Once you've opened the game and verified that everything is as it should be, you can repeat the steps above to create another copy. NOTE: If you mess this up, you could lose your game data, so only do it if you're confident that you know what you're doing.

And finally, here are the best items in the game, as compiled by waynerz99:

Camerons battered Iron Axe
Dragon sword of nobility
Luemars Deadly Mace
Tower shield of Godzilla
Spiked Gauntlets (40 damage / 40% chance of double damage)
Dragon Shards Of the Forum
Nike Greaves
Full Helm Of Salvation

All of these vary in cost between $1700-2000


Posted by DiMono - September 12th, 2009


Medal Walkthrough Table of Contents

----------

This is a second walkthrough for Pirate Golf Adventure. Wylina has an excellent walkthrough over here with all kinds of detail about the medals that I'm not going to go in to here. There's also a solution for the course there.

So why am I doing this walkthrough? Well, basically I sat down tonight specifically to get this medal, and forgetting to see if there was already a walkthrough I took a lot of time to figure out the easiest reproducible way to do each hole so I could refer back to it during gameplay. Some of my strategies are different, hence the guide. Shall we begin?

----------

Hole 1, 1 shot: aim over the center of the third coin, with the bottom of the hand 3 pixels above the crossbeam in the windmill. The bottom of the hand should be centred over the coin, not the finger. You'll know if you get this one right because you'll either collect 5 or 6 coins; if you get 7, you're going to miss.

Hole 2, 1 shot: over the tentacle, full power. Everything's always moving on this level, so aim just to the right of the tentacle's leftmost reach and wait for it to be about half receded, and you should pick up 3 or 4 coins along the way. This is anything but a precision hole, so don't even worry about it.

Hole 3, 2-3 shots: Aim above the second coin (finger centred) with the bottom of the hand against it, and you'll knock the boulder over and then bounce up in the air. You'll land softly in the cave and start rolling to the right. Halfway between the first colour change in the rock below you and the jagged edge, start charging a full power shot through the hole. If you bounce way up in the air, you're probably going to sink in 2. On a miss, you'll still be within easy range, so just tap in for 3.

Hole 4, 2 shots: Aim over the second coin to knock down the scaffolding and get rid of the crocodile, and let the ball settle in the little divot. Then line up the thumb of your hand cursor with the corner of the rock, a full handwidth away and give it full power. After you bounce off the right hand wall on your second shot it will look like you're going too far left, but don't worry, that landing area is wider than you think it is.

Hole 5, 2-3 shots: Aim for the bottom left corner of the hanging platform to knock the tree down, and you'll land between its stump and the tree to the left. Wait for the ball to roll all the way to the left of its landing area, then aim for the right corner of the cloud and let it rip. If the ball doesn't make it to the left for your second shot, tap it there for 3 shots on the hole.

Hole 6, 2 shots: aim for the left side of the first sunbeam, horizontally in line with the right edge of the cloud. This will land you on the whale's tongue, and you'll be able to see the blowhole as the ball slowly rolls up the tongue. While near the top of the tongue, shoot through the blowhole, judging required strength and angle on the fly. Some skill is required here; this is the hardest hole to get right, but landing on the tongue rather than taking a shot while bouncing makes it easier.

At this point, you may still have 15 shots left, which is PLENTY, believe me; the last two holes combined can be completed in 7 with a bit of practice (and 5 with a lot of practice).

Hole 7, minimum 3, realistically 4-7 shots: nudge forward, then when near the lava, fire full force against the right hand wall to bounce up on the cliff on the left. If you don't catch the windmill on your second shot, time a third shot to catch it (may require a fourth). The ball will roll all the way to the right after the windmill, then back to the left. It will make it all the way to the left if you catch a windmill blade that does NOT have the diagonal rope at the end. If it doesn't get all the way to the left, nudge it over there. When it reaches the left side, fire full force through the hole. On an unlucky bounce at the top, another shot may be required to nudge it in to the hole.

(Author's note: I caught the windmill in 4 on the correct blade, but had some terrible luck going through the hole and required 8 shots on the hole. I still finished with 21 shots and almost 300,000 points. My point is not to panic if you miss a few shots on these last two holes, because you have tons of them to work with)

Hole 8, minimum 2, realistically 3-4 shots: Immediately aim with full force for the left side of the bottom part of the peg, and after knocking it loose the ball should roll slightly up the hill to the left, then out to the right. Once it's clear of the rocky outcropping above it, shoot straight up with full force, then give a light guiding shot once it passes the top branch toward the hole. If you aim slightly to the right rather than straight up, you may land the hole in 2 if you time it right, but if you miss then you'll bounce back down and have to shoot up again. If you land between the hole and the bird, give a little nudge up-left and it should pop right in.

Total: 17-23 shots, or 15 if you land the optimal solutions for 7 and 8. Happy shooting!

Pirate Golf Adventure gameplay walkthrough


Posted by DiMono - September 9th, 2009


Index of walkthroughs

Here's my first walkthrough, for the new medal game Cave of Wonders. Since most of the medals are based on gameplay rather than on doing things in interesting ways, this walkthrough is going to take you through the game medal by medal, with advice on what to do at each stage.

Also, before we start, the secret medal isn't where you think it is. Just saying.

The first thing you need to do is pick up your wooden sword and your double-jump coin. You need both in order to trigger Luis, so the game lets you run around as much as you like while you're getting them.

If you're concerned about speed, you can actually get both of them by jumping up from the floor underneath if you time it right, and pressing A twice will get you past the text bubble. Time spent on text bubbles counts toward your gametime, so if you're after the speed medal be sure to mash the A key when you know there's text coming up. Time spent paused does not influence your playtime.

Once you've broken all 4 fluid containers, Luis in his first form appears. I find the fastest order in which to break the containers is the bottom left one first by swinging on the ground, then the top left one by doing a jump-spin-attack, then the bottom right by swinging on the ground, then the top right by doing a jump-spin-attack.

Black Coffin
All you have to do for this one is die. I'm sure it will happen on its own at least a couple times, but if you want to get it out of the way just stand still at this point and don't do anything, and the sweet embrace of death will take you.

Rude Awakening
Luis in his first form has a very simple attack pattern. He starts off with a large local-area attack, then shoots three green missiles at you which each travel progressively lower down the screen. Stand between the platform in the middle and the one on the other side of the screen from Luis, and as soon as the second missile clears you do a double-jump to get over the third one. As soon as you land, run toward him swinging, going all the way past him and then turning around to face him from behind. He'll then rage and run to the other side, and then the pattern will repeat. This strategy should have him down by the third round of attack.

If you're brave and want to save some time, you can approach him while he's firing the missiles and attack him during that attack. Enough hits like this and you may be able to take him down after 2 rounds of attacks instead of 3, but expect to take some damage. This is a nice trick if you're looking to shave time off a speedrun to get the 200 seconds medal.

Of note for this and all other medals is that you do more damage by attacking on the ground than you do attacking in the air. On the ground you do 3 damage per swing, in the air you only do 1, so whenever possible try to attack on the ground.

Tighty Whitey Power
After this, Luis transforms in to his second form, which is Luis in underpants. Swing at him immediately and until he turns in to a green ball, at which point your swings will be ineffective. Dodge him and his lollipops as he bounces around the screen, then when he lands start swinging again. You should be able to take him down by his third round. He always has to walk back to the centre of the screen in order to laugh at you, so if you're lucky and he lands toward one of the screen's edges you may be able to take him down in 2 rounds.

Stack The Deck
Now the platforms vanish and Luis shrinks back down to normal size and hops in a little hovercraft. He'll stay at the top of the screen dropping bricks and rockets. The rockets will slowly pursue you, and the bricks will stack in order to allow you to get close enough to him to hit him (the medal's called Stack The Deck, get it?).

He'll start at the middle of the screen, so you want to be under the visual peak just right of center to make the rocket take a little longer to reach you. While evading the rocket, try to get the boxes stacked 3 high as soon as possible. Once you have that, you can jump on top of the third and then do a double-jump to hit him. If you can get them stacked 5 high, then you're within single-jump attack range and can do more damage faster (thanks Wylo). Each time you hit him his craft lowers, so if the boxes are stacked high enough and you get him down low enough you'll actually be able to do standing attacks on him. As long as you manage to evade the rockets this shouldn't be too hard.

Abyss-mal and Grape Crush
Once Luis is dead, he'll trigger a collapse of the cave, and the race to the finish is on! You get Abyss-mal by falling in a hole, and you get Grape Crush by letting the falling rock kill you. Each one gives you a different death animation.

As of the most recent update (Sept 10, 2009), you now have 3 lives, and a series of checkpoints you automatically collect as you pass them. What that means is that during the fights with Luis, if you die you pick up where you left off, and if you die while you're making a break for it you pick up at the last checkpoint you passed. To get the Abyss-mal or Grape Crush medals, you must die in that manner on your last life. Lives are carried over from the Luis fights, so if you die twice fighting him, you only have a single run at escaping the cave.

Flee Powder
So you've decided to live. Good for you. Time to run! To get past the first obstacle, do a double-jump and let your automatic air attack do its job to get you to the top. Double-jump forward from the top to get over the first pit, and you're on your way.

The next obstacle is a zigzag, which can be tricky. To get to the level above you, stand just outside the edge of the platform and do a double-jump. Wait until you're at the top of the jump, and then hit the sideways arrow key to advance.

From this point on it's basically obstacles in a specific order for you to overcome. Rather than give you step-by-step instructions, here are the things you'll need to know about the various obstacles:

Floating platforms: Resist the temptation to always do double-jumps, as they will slow you down. Take a look at how far apart they are, and use that to judge whether to do a single- or double-jump

Giant bricks: They take 10 damage to get rid of, so be on the ground, hold the right arrow button, and swing away. 4 hits to a brick. For the sets of bricks that are hollow in the middle, you can do a double-jump to attack and end up inside the middle, which will shave some time off your run. (that last tip courtesy EggSaladSandwich)

Red crushers: Each set runs on a fixed timing. Just be patient, and make a break for it at the first opportunity.

Jumping acid: Rather than jumping from the ground, do a double-jump from the top of the wall. It will get you over the acid even if it's at its maximum height. If the acid hits you you will be wounded, but you'll survive. It will also raise you up a bit, so if you hit it after doing a jump that wouldn't have gotten you across the pit, you may make it now. This can come in handy when you hit the jump key a little too late and your double-jump is triggered early.

Final wall: Just double-jump against it and hold on to that right arrow button, and you're out!

Lou Lou Zoom
So you've decided to take on the speedrun, have you? It's actually not that hard. Practice, but don't panic. You don't need a perfect run to get this medal, and once you reach the exit there's a timer in the bottom right corner that tells you how long you took. That number has to be under 200 seconds; 200 seconds exactly isn't going to cut it.

Real Ultimate Power
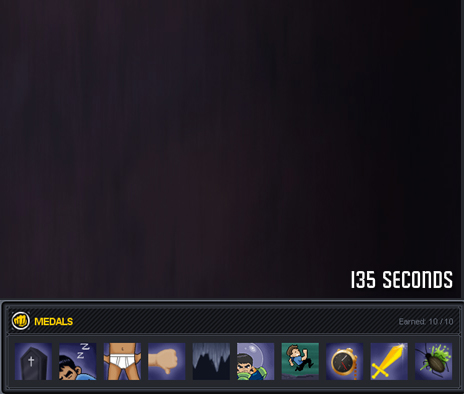
Once you've gotten the 9 other medals, this one will check itself off for you too. If you then continue to play, you'll pick up a gold sword instead of a wood sword when you go for your weapon. The gold sword does 3 damage in the air and 5 on the ground, and you can actually take out Luis in his second form before he even turns in to a green ball once. The time in the picture below was achieved on a sloppy run with the gold sword (my best is 127, optimal run is probably in the 114-116 area), and a sloppy run with the wood sword got me the Lou Lou Zoom medal in 181 seconds (my best is 160, but I know 145 has been done). Remember though, you need the secret medal to get this too, so get hunting!

Good luck!

Cave of Wonders Medal Walkthrough