00:00
00:00
DiMono
Deploy the... I think it's a yellow button... it's usually flashing... it makes the engines go... WHOOSH!

DiMono @DiMono

Age 43, Male

Website Developer

Toronto, Ontario

Joined on 9/8/04

Level:
32
Exp Points:
11,032 / 11,370
Exp Rank:
2,814
Vote Power:
7.35 votes
Rank:
Sup. Commander
Global Rank:
186
Blams:
4,168
Saves:
35,103
B/P Bonus:
60%
Whistle:
Deity
Trophies:
2
Medals:
5,343

DiMono's News

Posted by DiMono - April 15th, 2010


Back to Wylina's Games with Medals Table of Contents

Talesworth Adventures is liquid awesome. It's a puzzle adventure game where you tell the guy what path to follow, according to some simple rules.

Gameplay Tips

Most of the gameplay is already outlined within the game, so here are just a few minor things that aren't:

You don't always need every item available to you on a level. There are a few levels where the solution doesn't require every item, and in one case isn't what you're expecting it to be at all.

You need to kill the thief the first time you see him. If you don't, he'll show up on the second-last level and steal your gem, preventing you from getting all 25. Fortunately, you can go back to the Map and return to the first thief room and play it again, and if you get rid of him the second time playing the room you'll be able to play the second-last level without him.

Arrows will kill monsters, as will boulders. Boulders will also deflect arrow shots. Boulders will not, however, deflect the dragon's breath; only closed doors will do that. Boulders behave exactly the same as you do, except they don't follow the moneybags.

Video Walkthrough

Part 1:

.
/* */
Part 2:

.
/* */
Expected solution for bonus room 3:

.
/* */
Solution for the first red room after its update:

.
/* */
Medals (8 medals, 180pts)

Noob Test (5pts) - Solve every easy (blue) room

A Novice No More (5pts) - Solver (sic) every medium (teal) room

Warrior Proper (10pts) - Solve every hard (purple) room

True Adventurer (10pts) - Solve every challenging (red) room

Glutton for Punishment (25pts) - Solve every bonus (green) room. Bonus rooms are not required to beat the game, but they are required to get all the medals.

Purveyor of Finery (25pts) - Collect all 25 gems located throughout the castle. Once you see the first one, they're all in a row, one per room. 3 are in bonus rooms.

Hoard the Hoard (50pts) - Slay the Talesworth Dragon and obtain his hoard. Basically, beat the game.

Thinking Things Through (50pts) - Complete the game using 5 or less Resets. Basically, beat the game well.

Talesworth Adventures Ep. 1 Walkthrough


Posted by DiMono - April 14th, 2010


Back to Wylina's Games with Medals Table of Contents

Escaping the Prison is an interactive movie, like a choose your own adventure. It's also adorable.

Endings:
Sneaky: File -> Door -> Click left -> Click right -> Chair -> Right -> Plungers
Badass: Drill -> Crowbar -> Down -> Left -> Click in time
Legal: Cellphone -> Bag

Fails:
Teleporter
Rocket Launcher
NrG Drink (donut get before your dude grabs it)
File -> Window
File -> Door -> Nothing
File -> Door -> Click left -> Nothing
File -> Door -> Click left -> Click right -> Grenades
File -> Door -> Click left -> Click right -> Chair -> Left (3 donut get from the table on the left)
File -> Door -> Click left -> Click right -> Chair -> Right -> Rocket pack
File -> Door -> Click left -> Click right -> Chair -> Right -> Rope
File -> Door -> Click left -> Click right -> Chair -> Right -> Parachute
Drill (bagel get on the shelf) -> Opaquometer (donut get from the desk as you go through the jail)
Drill -> Crowbar -> Nothing
Drill -> Crowbar -> Up
Drill -> Crowbar -> Down -> Nothing
Drill -> Crowbar -> Down -> Down (Medal get: LOL Brawl Reference)
Drill -> Crowbar -> Down -> Left -> Nothing
Cellphone -> Anything but the bag

Medals (7 medals, 340 points)
LOL Brawl Reference (5pts) - ROFL ROFL ROFL. Drill -> Crowbar -> Down -> Down

Legal Ending (25pts) - Break out the legal way. Legal ending as above

Badass Ending (50pts) - Break out the badass way. Badass ending as above

Sneaky Ending (50pts) - Break out the sneaky way. Sneaky ending as above

Donut Want! (100pts) - Or do you? Get any 10 donuts as outlined above. You will have to repeat some. Don't know if the bagel counts.

Lots of Effort (100pts) - Find all 18 FAILs. As listed above

Secret Medal (10pts) - Shhh... it's a secret. It sure is

Escaping the Prison Walkthrough


Posted by DiMono - April 12th, 2010


So I made this list of medals I don't have, along with why I don't have them. If you know one or some of these medals are easier/less grindy than I think, and have advice, please do let me know in comments so I can attempt them.

Cheers.

Mechanical Commando 2:
Boss Run (50) - broken
Golden Commando (100) - will take too long

Punk-o-matic 2: Cover Band (50) - way too hard at that speed

zOMGies: Boom! (10) - broken

Santa Fu!: Santa Fu Master (50) - Oh, the GRIND!

Kill Kar 2: Kustomized (25) - broken

Dale & Peakot:
Big Winner (100), It's Impossible To... (100) - grind

Level Up!: Insomniac (50) - grind

MonsterTime: You Da Man (100) - Fucking Hard

T E T R I S ' D: Ninja (100) - damn hard

Miami Shark: Sailor (50) - grind

Medieval Rampage 2: All Achievements (100) - grind

Fig. 8: Professional (50) - broken

Dadgame:
Cheating Death (50), Dadgamer (100) - grind

Knightfall 2: Grandmaster Flash (100) - working on it, off and on

Epic Battle Fantasy 2:
Minigamer 1 (10), Minigamer 2 (10), Minigamer 3 (25) - grind

Bomb Diggity: Most (365) - I'm bad at this game

When Pigs Fly:
Halfway Home (50), All The Way Home (100) - I'm bad at this game

William and Sly: Sly Fox (100) - grind

Lastman:
Beetle Battle (100), Secret Medal (100) - Fucking hard

Epic War 3: All (460) - GRIND

Drop the Bomb:
Bomb Squad (10), Someone Set Us Up The Bomb (25) - broken?

D-Day Defender:
Get Out More (100), Master Tactician (100) - grind (I actually achieved Master Tactician, but the medal didn't come with the in-game achievement)

Seed of Destruction: I Am Illiterate (10) - broken

Medieval Rampage: 100 Achievements (100) - grind

Red Moon:
Orb Hunter (100), Red Moon Deity (100) - grind

Sonny 2: All (235) - grind

Doom Triple Pack: All (320) - grind

SeoMX Skating Video V2: All (10) - broken

Alkie Kong 2:
Full Case (50), Olympian (50), Survivalist (50), Drunken Deity (100) - grind

GAMES KNOCKED OFF THE LIST:
Tetraform
Tower of Greed
Invisible Runner (had a hunch I'd get this if I tried today)
M-Bot The Game
Extreme Gardening
Kill Kar 2 (non-broken medals)
Fig. 8 (non-broken medals)
Wee Express
Portal Defenders
Epic Battle Fantasy
Armed Prophet
Save The Goons


Posted by DiMono - April 1st, 2010


Back to Wylina's Games with Medals Table of Contents

Wild River is a relaxing game where you float down the river collecting ammo, and then ejaculate it all over Kevin Bacon's face. And really, what better way is there to celebrate Kevin Bacon day?

Gameplay
The controls are backward from how you would expect them to be. For some reason a person paddling has the opposite effect in this game to how it would be in real life, so it will take some getting used to. Pressing the right key turns you left, and pressing the left key turns you right.

Make sure you collect lots of ammo on your way down the river, as you'll need it later. It takes 5 shots to get rid of each blockade, of which there are 2, and then either 25 or 26 to defeat Floating Kevin Bacon Head, plus any shots with which you miss.

.
/* */
Medals (2 medals, 75pts)
Bacon Beater (25) - Defeat Kevin Bacon. Finish the game, basically.

Bacon-ator (50) - Beat the game in under 100 seconds. Finish the game, but faster!

Wild River Medal Walkthrough


Posted by DiMono - April 1st, 2010


Back to Wylina's Games With Medals Table of Contents

Extreme Gardening is a fun game if you want to kill some time, and a frustrating game if you're going after medals. The gameplay mechanics are that you have 3 seconds to memorize what the tree should look like, and then 10 seconds in unresponsive and clunky mouse controls to make it happen.

Gameplay Tips
1) When you run into a level you have difficulty with (i.e. 12, 13, 14) take screenshots of what they're supposed to look like, and have the screenshot sitting next to the game as you play. This will save you from having to remember every minute detail, as they will all be there on the screen for you. Even better, tape a piece of translucent paper over the screen and trace the shape you're supposed to make, and then just clear where appropriate. Taping paper is the only somewhat reliable way to get all golds; screenshots will only get you to silver.

2) If you're chasing all gold medals without a piece of paper, stab yourself in the eye, because you're more likely to get satisfaction from blinding yourself than you are from chasing 15 gold medals in this game in that way. If you want to get all gold medals without committing suicide, you need to use paper.

3) To save time, which is vital, rather than waiting for the game to tell you to go, you should already be holding down the mousebutton. The game doesn't check when you push it, only that you push it, so if you're already holding it down you'll be able to take your reflexes further away from being a deciding factor in your score.

Medals (9 medals, 360pts) - rearranged into a logical order
1st Bronze (5) - Your very first bronze! Eke out a level.

1st Silver (10) - Your very first silver! Get halfway between the bare minimum to pass and 100%. So if you need 80%, 90% will get you the medal.

1st Gold (10) - Your very first gold! Get 100% on a level. Most likely to happen on levels 1 and 15.

Day Area (10) - Complete day area! Finish the first 5 levels.

Sunset Area (25) - Complete sunset area! Finish levels 6-10.

Night Area (50) - Complete night area! Finish levels 11-15.

All Bronzes (50) - Collect all bronzes! Finish all levels with bronze or above.

All Silvers (100) - Collect all silvers! Finish all levels with silver or above.

All Golds (100) - Collect all golds! Finish all levels with gold. If you want this medal, you're going to be taping paper to your screen so you can trace things. As far as we are aware, the minimum scores for gold medals on each level are as follows:

level 1 "Introduction": 100%
level 2 "Basics": 99%
level 3 "Hoop": 100%
level 4 "Treesome": 100%
level 5 "Horticulture": 99%
level 6 "Nouvelle Vague": 99%
level 7 "The Man": 99%
level 8 "What?": 100%
level 9 "Connection": 99%
level 10 "Perfection": 100%
level 11 "Grrrrrr": 96%
level 12 "Forest": 99%
level 13 "A Classic": 95%
level 14 "Masterpiece": 91%
level 15 "Future Art": 100%

Extreme Gardening Medal Walkthrough


Posted by DiMono - March 31st, 2010


Back to Wylina's Games with Medals Table of Contents

Enigmata: Genu's Revenge is the sequel to the original Engimata, which also has medals. More of the same, along with some extra stuff.

Gameplay Tips:
As with all games of this type, there are a number of different strategies you can go by. queenofbabes wrote this about his strategy. Here's mine.

Missions are an invaluable part of getting achievement points. You get them and collect them by going through the portal that appears randomly in most levels, and they almost all involve killing lots of a type of enemy that occurs on the level in which you accept the quest. Some of the later missions involve enemies you won't see for a couple levels yet, and one involves collecting a particular rare drop, but those are the exception. Not only do you get cash and achievement points for completing missions, you also get some in-game achievements for finishing 5 and 15 of them, for even more. Finishing missions early will help unlock parts of Neko's Shop.

Focus on upgrading your base ship first. That will give you the best overall improvement early on. I like the blue ones, because I find them to be the most balanced.

Collect items, but try to save them as much as possible because you'll need them later. Genu and the final boss can all be beaten rather easily by stopping time and replenishing your energy while firing away, which means you need to save those purple items for as long as you can.

There are some rare weapon upgrades in the game, and they can be combined with specific normal weapon upgrades to get upgraded versions of the rare weapon. These combinations are:

unsheathed plasma (purple) goes with fusion
the blue orbs (forget the name) go with tetra fire
yellow and blue lasers go with double fire

The blue lasers with double fire are the most powerful weapon in the game. Each rare weapon has an even rarer variant which combines the same way as its base type does.

Nekon Attack missions are fun, but not necessary for the medals. Kill lots of stuff, collect all their drops, in a certain amount of time. Strategy for them I leave to the reader.

Recommended shop items:
1) Cargo Expansion (basic). Increases your storage capacity so you can buy more upgrades.
2) Neko's Bonus Charm (basic). Increases item drop rate, which makes it easier to find things.
3) Gold Generator (elite). Gold is created as you fly, which makes it faster to accumulate enough gold to buy things.
4) INFINITE Bonus (black market). Your weapon upgrades last forever, or at least until you pick up one to replace it with. Invaluable for when you finally get that double firing blue laser.
5) Fiery Amulet (black market). More likely enemies will drop rare bonuses. Makes it easier to find the blue laser.
6) Time Nullifier (black market). This is specifically useful for getting the in-game achievements based around getting Amazing or Perfect in all 4 level categories; then you can replace it with something else.
7) Conquerer's Seal (black market). Boosts everything relevant all at once. Think of it as a minor overall ship upgrade.
8) Auto Neg. Effect Canceller (black market). Triggers your neg effect canceller as soon as you pick up a neg effect.
9) Second Chance (black market). When you die, you come back with rather a lot of shields and armor. Once.

Once you get to the point that you're using energy on a regular basis, you'll want to invest in the Megacorp V4 Nuclear AUX (elite) to get your energy charging as you play, and I like having the Micro Repair Bots (basic) also, which means all 3 of my ship stats are always increasing themselves as I play.

Beyond that, whatever upgrades fit your playing style. I always take the E-Magnet Missile Launcher (basic; missiles fire faster) and the Fion Assimilator (black market; unlimited missiles of all types) and all the extra attacker upgrades, because that fits with my playing style. That includes things like the Death Blast (black market) and Cytoreactor (elite).

Skills:
The following skills are absolutely required in order to get through this game completely:

1) Healing Technique (basic). Trade energy for armor.
2) Destroy Shields (basic). Required for some of the early-mid levels where you encounter lots of a particular ship that has shields. After about level 15 you're highly unlikely to encounter those ships again, and can remove this.
3) Stop Time (rare). Time stops, you don't. You WILL need this in order to defeat Genu or the final boss, and I use it whenever I encounter some of the larger, more vicious ships on the way through the level.
4) Negative Effect Canceller (rare). When you hit a bonus with a negative effect, this skill removes it. Along with the Auto Neg. Effect Canceller shop item, this will keep you out of a lot of trouble as you play.
5) Bonus Lock (ultimate). Locks your current weapon so other bonuses won't change it. That means you can pick up bonuses indiscriminately and not worry about losing your double-firing blue lasers. You will have to enable this skill at the beginning of every level, and you can still lose your weapon if you pick up a bonus with a Z on it, as that is a bonus removing item that cannot be blocked.

queenofbabes has some other skill recommendations in his guide, which I will leave there as they are his. They come down to his playstyle, which may be different than yours. He plays a more skills-based game, while I play a more weapons-based game.

Missiles:
Never buy missiles. You don't need them, and only the bosskillers are even worth it. Instead, accumulate 11 million gold. Move Nukes and Death Missiles (both bosskillers) onto your skill bar without purchasing them and then purchase the Fion Assimilator (elite) to get them both to have unlimited ammo. I use Death Missiles on regular enemies, and then switch to Nukes for the bosses.

Rank 3 Achievements:
Here are the Rank 3 achievements decoded:

Warlord (200,000 Gold) - Heartlessly defeat 2000 enemies
Mega-Insanity (100,000 Gold) - Crash into a boss 15 times
The Box of Doom (140,000 Gold) - Collect an exploding box.
Filthy Rich (300,000 Gold) - Obtain 5 million gold
Strange Irony (430,000 Gold) - Destroy Neko's shop
Obliviator (400,000 Gold) - Defeat over 95% of enemies in a level past level 10.
Non-Random Achievement (800,000 Gold) - Just kidding, it was random.
Just Made It (1,200,000 Gold) - End level with 5% armor and shield remaining.
Titan (1,500,000 Gold) - Create a ship with 5000 armor
Sniper (1,000,000 Gold) - Finish a level with over 95% accuracy
Badge of Conquest (1,000,000 Gold) - Complete 15 missions
Full Capacity (2,000,000 Gold) - Acquire all skills
O.C.D. (2,500,000 Gold) - Own everything in the three shops.
Perfectionist Elite (3,000,000 Gold) - Finish a level with 4 Perfects beyond level 16.
Ultimate Defender of the Enigmata (1,000,000 Gold) - Defeat 10000 enemies

Box of Doom will drop randomly in a level above 15. Titan requires the Ledgendary [sic] Key, which I got as a random drop in level 19, in order to purchase the black market shop item The Fifth Collection, which gives you the Pseudo Epic ship, with a base armor over 1000. Then just add on every armor boosting upgrade you can find. The rest will occur as you play, with Strange Irony happening on random level replays.

Medals (4 medals, 235pts):
Eterna Medal (10) - Defeat the ship who destroyed the supply base. Level 1

Mega-Goliath Medal (25) - Destroy the indestructible mega-craft. Level 10

Genu Returns Medal (100) - Take down the ulimate ruler of the universe. Level 20. By using Time Stop and Micro Energy Boosts (which appear to be bugged to restore all energy rather than only 50) you can take down Genu before he even gets a shot off.

The Entity Medal (100) - Beat the most powerful mega-craft ever created.. Level 25. I got this with Time Stop (used a lot but not constantly), lots of shield boost items, healing skill, and a lot of patience. This will be a 5+ minute fight.


Posted by DiMono - March 29th, 2010


Back to Wylina's Medal Games Table of Contents

NerveJangla is a game of pattern recognition and speed.

General Gameplay Tips:
To finish under 150 seconds for the 100pt medal, you'll most likely need to either slow your computer down, or play on one that's already slow, in order to slow down the timer.

Character matching levels: There are 10 options for the head, body and legs, so if you go too far just click until you've gone too far 10 times. It shouldn't cost you more than a second. Try to memorize which options come early for each part, and do those ones first, and then you can click as quickly as possible on the last part without having to worry about going too far.

Ninja Toss: You don't actually need to throw the ninja every time, you can move him over a star, release and click again quickly, and he'll pick up the star. This strategy is instrumental in getting a fast time on these levels. When you do have to drop or toss him, try to catch him before he hits the ground, to minimize your time spent on the level.

Yin 2 Yang: For levels 18 and 24, it is helpful to drag Yin to the wall before attacking the level, as it makes it easier to get him to the other side in time.

What Am I?: In my walkthrough below, the first word is the "default" word. By that I mean the letters are available in the order in which they appear in the first word I've put below. So if you get DOG for the first one, you'll click the first letter once, the second letter twice, and the third letter 3 times. If you get GOD for the first one, you'll click the first letter 3 times, the second letter twice, and the third letter once.

Text Walkthrough:

Easy Round
Level 1: Drag the donut into the cup
Level 2: Drag the wall up, release, drag Yin to Yang
Level 3: Click the right character's body parts until the two match
Level 4: Find the robot that opens its mouth in the other direction
Level 5: Toss the ninja, get the stars
Level 6: Click once in the outer star, twice the next one in, three times the third one in
Level 7: Drag the wall over Yin to the left, let go, drag Yin to Yang
Level 8: Match them up according to their teeth
Level 9: DOG or GOD
Level 10: Shoot the targets, avoid the walls
Level 11: There are 5 triangles

Medium Round
Level 12: Click the bird, then click it again when it's over the dude's head
Level 13: Drag the wall to the left to bump Yin off the screen, then drag Yin to Yang
Level 14: Click the right character's body parts until the two match
Level 15: Find the robot whose mouth moves toward the left
Level 16: Toss the ninja, get the stars
Level 17: Click each part of the star once to make it all grey
Level 18: Drag the wall up, let go, quickly drag Yin to Yang
Level 19: Match them up according to their mouths
Level 20: MOON or MONO
Level 21: Shoot the targets, avoid the walls
Level 22: There are 14 squares

Hard Round
Level 23: Click the cactus thorns until they disappear
Level 24: Drag the ground down, let go, quickly drag Yin to Yang before the wall falls
Level 25: Click the right character's body parts until the two match
Level 26: Find the robot whose eyes rotate toward the outside rather than the inside
Level 27: Toss the ninja, get the stars
Level 28: Click each part of the star once, and rotate it once
Level 29: Toss Yin over the wall; will take some practice
Level 30: Match them up according to the faces of the inner dolls
Level 31: STONE or NOTES/TONES
Level 32: Shoot the targets, avoid the walls
Level 33: There are 13 lines

Short Round
Level 34: Hold the ninja for a few moments, then release

Full Medal Video Walkthrough:

.
/* */
Medals (8 medals, 230pts):
RankSurvivor (5pts) - Complete the game. This can be done at any speed, just get through it.

Stage1 (5pts) - Complete the easy round. Finish the first 11 levels.

RankBronze (10pts) - Finish in under 300 seconds. That's 5 minutes to you.

Stage2 (10pts) - Complete the medium round. Finish the first 22 levels.

RankSilver (25pts) - Finish in under 250 seconds. A little faster now.

Stage3 (25pts) - Complete the hard round. Finish the first 33 levels.

RankGold (50pts) - Finish in under 200 seconds. Not actually that difficult.

RankNinja (100pts) - Finish in under 150 seconds. You'll probably need to play on a slower computer for this one.

NerveJangla Walkthrough


Posted by DiMono - March 24th, 2010


Back to Wylina's Medal Games Table of Contents

A Blob's Tale 2 is a fun, quick little platformer/puzzle game. You should play it.

Gameplay
AWD to move and jump, E to use the shield once you have it, mouse to aim the shield and throw your boomerang, Space bar to interact with levers, gears and puzzle pieces, and to pick up the shield. You have infinite lives, but there are really only 4 places you can reasonably expect to lose one, so it shouldn't take long to get all the medals in this game.

.
/* */
Medals (4 medals, 255pts)
First Death (5pts) - Life after death. Die.

Can't Get Enough! (50pts) - Replay the game. Start a game, then close the window. Then come back and continue your game. You may need to move off the first screen in order to do this.

I Don't Need Lives! (100pts) - Finish the game without dying. You actually only need to make it to the final boss without dying.

Kill The Main Boss (100pts) - Defeat the main boss. You heard the man!

A Blob's Tale 2 Walkthrough


Posted by DiMono - March 22nd, 2010


Back to Wylina's Medal Games Table of Contents

St. Pattack is a platform fighter with just a little bit of charm, where you get to kick the ever living tar out of a bunch of leprechauns.

Gameplay
There are two difficulties, easy and hard. The differences are that on hard the enemies have more hit points, Pattack has fewer, and bowls of stew don't seem to drop as often. You also must be playing on hard in order to get the last two medals. It also takes more coins to advance to the bosses in hard mode.

In order to have any chance at all of surviving, your best bet is to take the high ground. This will minimize how many leprechauns you have to deal with at any given time, and it will let you knock them down, to minimize the damage they can do to you. Note that they like jumping up behind you more than jumping up in front of you, so plan your gameplay strategy as such. There's also no really compelling reason to not always be attacking, unless you're going after the don't hurt sheep medal.

You can block and do your dash attack in midair, which can be useful at times. Before you encounter the final boss you'll lose all your rainbow attacks, so you may as well use them all up on level 2.

Enemies
There are 3 main enemies, plus the two bosses, plus sheep.

Sheep: They can't fight back, and they make a satisfying thump when you hit them.

Snake: They slither around, and they can hit you, but only if you're standing still. Otherwise they'll just follow you around.

Boxers: Leprechauns like to fight. These are the first type of leprechaun you'll encounter in the game, and they'll walk up and try to punch you in the balls.

Clover Throwers: These leprechauns toss their clovers at you from a distance, and are more dangerous than the boxers because of the added range they bring.

Boss 1 - the Druid: He commands the elements, except for fire. And except for rainbows, which you can fire at him rather than the other way around. You need to hit him with rainbows and his own boulders, by deflecting them back at him, and then get out of the way so you can trade positions with him.

.
/* */
Boss 2 - Psych O' Brian: The final boss. First you beat him up like any other leprechaun (though slightly larger), and then he grows to Hyde proportions everywhere above the waist and comes at you again. To defeat him, use the platforms to jump over him, and hide under the platforms when he starts dropping bricks, in order to avoid getting hit. Once he drops them he gets hit himself, and he will be dazed until you hit him to knock him out of it.

.
/* */
(note: second video has just been uploaded to YouTube, and may not yet be ready for playing; be patient)

Bonus Round
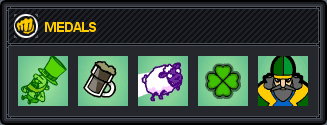
After defeating the Druid, you'll get to play the bonus round, in which you hurt sheep and collect the stew which is made from them. The more you get here, the more advantages you get when you return to the game. Anything that shows up in the achievement list gets added to your character, so if you get the potato and 3 cups of ale (my personal best) then you are slightly healed and have full rainbow power again.

Medals (5 medals, 120pts)
Juggling (10pts) - What an entertaining pastime! Juggle some leprechauns a lot. It's unclear exactly what the juggle requirement is, but odds are you'll get this playing through hard your first time on hard. It can also be attained in easy mode, but it takes a bit more luck to get a leprechaun who won't die too quickly.

The Special Day (10pts) - Happy St. Patrick's Day! Play the game on St. Patrick's Day. Or, if you missed the special day, you can change your computer's clock to March 17 and you should get it anyway.

Good Shepherd (25pts) - Sheep are fun to hit, but you declined... Finish the entire game without hitting a single sheep. This can be attained in easy mode.

Life Saver (25pts) - Kept your four leaf clover throughout the whole game. Finish off all of level 1 including the Druid without losing a life. This must be done on hard mode.

Master (50pts) - No one can stop you! Beat the game on hard mode.

St. Pattack Walkthrough


Posted by DiMono - March 17th, 2010


Back to Wylina's Medal Game Table of Contents

LARRY: Doug-Out is a game where you serve drinks to customers, and beat the everliving snot out of the town drunk. Really, it's a game that should have come out on St. Patrick's Day, so on St. Patrick's Day is when I write the walkthrough.

Upgrades
There are three things you can upgrade, being the quality of your ale, the quality of your weapon, and your storage capacity.

Ale Quality:
You can upgrade this 9 times, and it will increase how much money you get for each sale. Upgrade costs are $30, $60, $120, $200, $300, $420, $550, $700, and $900, and there's a medal waiting for you when you finish.

Weapon:
You can upgrade this 4 times, and it will decrease how many times you have to hit Doug in the face to get rid of him. It will not halve the amount of hits, but it will decrease it, and there's a medal waiting for you when you finish upgrading it. The weapons are as follows:

Start: fist
$100: stick
$250: 2x4
$500: hammer
$1000: large hammer

Storage Capacity:
This adds a full keg to your storeroom, and you can do it 4 times. The cost to add a keg doesn't go up, so when it's time to fill a keg but you're low on funds, you can do it this way instead. Upgrade costs are $40, $80, $120, and $180, and there is no medal for doing so, so unless you want the high capacity to ensure getting the $2000 medal it may not be worth it.

Gameplay
Gameplay is explained thoroughly at the start of the game, so I'll just cover some tips and tricks here.

The Game Gets Unforgiving: As you progress through the game, overfilling will overfill by more and more, and underfilling will get you less and less money while using closer and closer to the full amount of ale. Eventually you'll get to the point where you can underfill by a tiny amount and get $0 for it, or overfill to the point where you empty an entire keg into a single bucket or wineskin. This, coupled with the increasing speed of the meter that indicates how much you're pouring in, makes the game really hard to keep up with in later levels. Also Doug will drink more and more of your ale at a time, eventually reaching the point where he's drinking more than half a keg each time.

General Strategy: In order to ensure that you can survive long enough to get the harder medals, remember that you only really need to keep one keg in the back, not all of them. That means you won't have to guess which one Doug's popping out of, because it will always be the same one, and as long as you upgrade the quality of your ale regularly you'll be able to keep up with the refilling cost without any problem.

Dealing With Doug: You don't need to be at the bar in order for Doug to come around, you just need to be outside the back room. You also don't need to be at the bar in order to head to the back room; you can be on your way to the bar and click the right side of the screen, and you will return to the back room (unless you're carrying a keg). This means you can get the jump on Doug by anticipating when he will show up, and walking back and forth through the door of the back room until you hear his stupid laugh. This method is required in order to stop Doug from drinking any of your ale in later levels.

More Dealing With Doug Faster: If you only have one keg for him to pop out of, you can take advantage of that by spam-clicking it. After you hit him the first time, it takes him time to descend back into the keg, but you can still click on him because his head is still showing. This means you can already be on your way down in your attack by the time his head starts popping up, and the timing is such that you'll always hit him, which means you can deal with him much more quickly than when you wait for him to pop out of one of many kegs and have to move the mouse over to him.

Avoiding Doug Entirely: If you'd rather simply not risk Doug in the first place, only have one keg stocked and go get it before he shows up. You'll lose some potential profit from the overflow as you pour a full keg into a most likely half-full keg, but you won't have to deal with Doug, and at later levels he takes quite a lot of ale each time he drinks, as well as taking a long time to get rid of. It basically comes down to whether you think it's worth it.

Preposterous Funds: Starting on roughly level 22, you can get significantly more money than you're supposed to get by filling your customers' cups at the very bottom of the drink gauge, rather than at the middle where you're expected to click. This makes the $2000 in a day medal incredibly easy. Unfortunately, this isn't always the money bug that happens; sometimes you'll get less than full value for overfilling instead, to the point where at level 30 you empty an entire keg into a single wineskin and get $13 for it. If you don't get this bug the way you want it, then you'll just have to play the old fashioned way: carefully.

Doug Time
I tracked when in the day Doug shows up, for the first 30 days. Where it says (time done + x:xx) that means the amount of time between getting rid of him the first time, and having him show up for the next round; so on day 11, for instance, I finished dealing with him at 10:25, and then 1:35 passed and he showed up again.

I only tracked the first 2 times he shows up, because I use the 1 keg method which means that's all he ever gets to do, but he will keep showing up throughout the day at the same interval between finishing with him the first time and the second time he shows up. Note: These times are approximate, and when Doug shows up seems based on how much time you spend outside the back room, rather than how long between hitting him; my time measurements below assume walking straight out and back when appropriate, with no wasted time.

Day 1: 12:30
Day 2: 12:00
Day 3: 11:00
Day 4: 10:40, 2:10
Day 5: 10:25, 1:35
Day 6: 10:10, 1:05
Day 7: 10:00, 1:40 (time done + 2:10)
Day 8: 9:50, 12:55 (time done + 1:55)
Day 9: 9:45, 12:45 (time done + 1:45)
Day 10: 9:35, 12:15 (time done + 1:40)
Day 11: 9:30, 12:00 (time done + 1:35)
Day 12: 9:25, 11:55 (time done + 1:30)
Day 13: 9:20, 11:40 (time done + 1:25)
Day 14: 9:20, 11:35 (time done + 1:25)
Day 15: 9:15, 11:20 (time done + 1:15)
Day 16: 9:10, 11:15 (time done + 1:15)
Day 17: 9:05, 11:15 (time done + 1:15)
Day 18: 9:00, 11:10 (time done + 1:15)
Day 19: 9:00, 10:55 (time done + 1:05)
Day 20: 8:55, 10:25 (time done + 0:50)
Day 21: 8:55, 10:20 (time done + 1:00)
Day 22: 8:50, 10:15 (time done + 0:55)
Day 23: 8:50, 10:10 (time done + 0:55)
Day 24: 8:50, 10:05 (time done + 0:50)
Day 25: 8:45, 10:05 (time done + 0:50)
Day 26: 8:45, 10:00 (time done + 0:45)
Day 27: 8:45, 9:55 (time done + 0:45)
Day 28: 8:45, 9:50 (time done + 0:45)
Day 29: 8:40, 9:50 (time done + 0:40)
Day 30: 8:40, 9:55 (time done + 0:40)

Medals (7 medals, 270pts)

Best Quality In Town (10pts) - Max upgrades in ale quality. This will cost a total of $3280.

Maxed Weapons (10pts) - Max upgrades in weapons. This will cost a total of $1850.

Bloody Doug (25pts) - Beat Doug to his bloodiest. How many hits this takes depends on which weapon you're using, but you'll likely get the medal within the first 5 or 6 days.

Perfect Run (25pts) - Beat a level past day 5 without losing any ale from Doug. The actual requirements are different. What you actually need to do in order to get this medal is to fight off Doug on a level past day 5, having not lost any ale up to that point! So if you lose any ale to him at all within the first 5 levels, you're going to have a lot of tutorial screens in your future. The most sure-fire way to get this medal is to exhaust your first barrel on day 1, and then walk to the back room and wait for the day to end. On day 2, refill your barrel and give out 3 or 4 drinks, then walk to the back room and wait for the day to end. Starting on day 3 keep the front barrel full and one barrel in the back, then hand out about 3 drinks, then go to the back and refill your keg, to avoid Doug entirely. On day 6, anticipate when he will appear (estimated times are above), and go back and forth between the front and the back room (but not all the way to the front; just alternate clicking on either side and let your dude get dizzy) until he shows up. Fend him off, and you will receive the medal.

Endurance Master (50pts) - Last up to day 15. Using the single keg method, this is extremely easy.

Maxed Money (50pts) - Earn over $2000 in one day. If you get the preposterous funds bug as listed above, all you have to do for this medal is wait until day 22 or so and click at the bottom of the gauge. If you don't want to rely on that, however, you'll have to be quick when hitting Doug and accurate when filling ale, which basically means you'll want to max out your weapon and ale as quickly as possible.

Massive Score (100pts) - Reach a score of 1 million. You'll most likely get this around day 19.

LARRY: Doug-Out Medal Walkthrough